Now assuming you’ve takenin to account all the points I mentioned in part one of my handlebar swap posts you’re ready to fit the new bars.
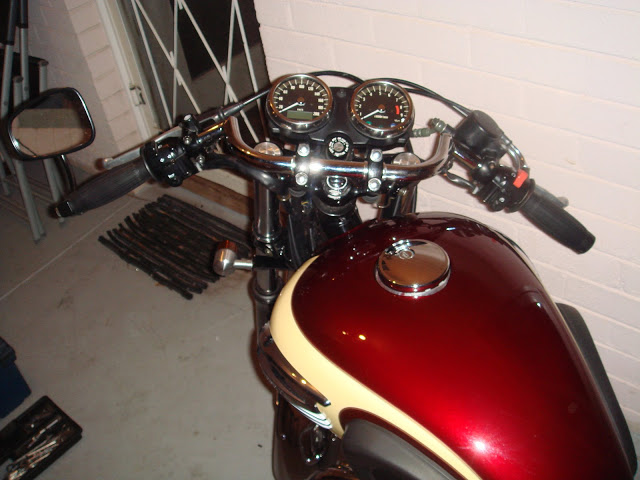
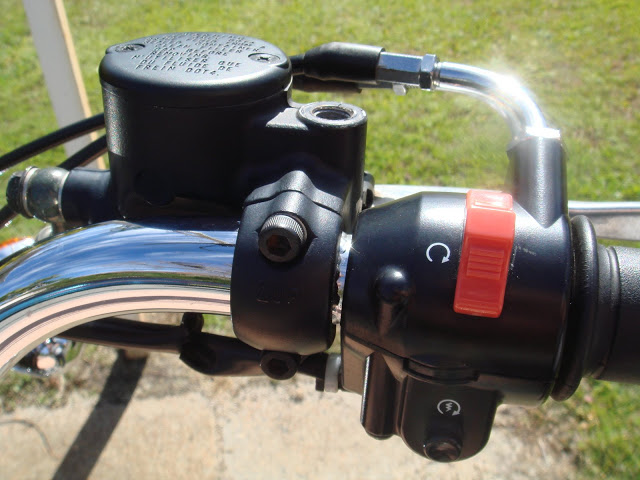
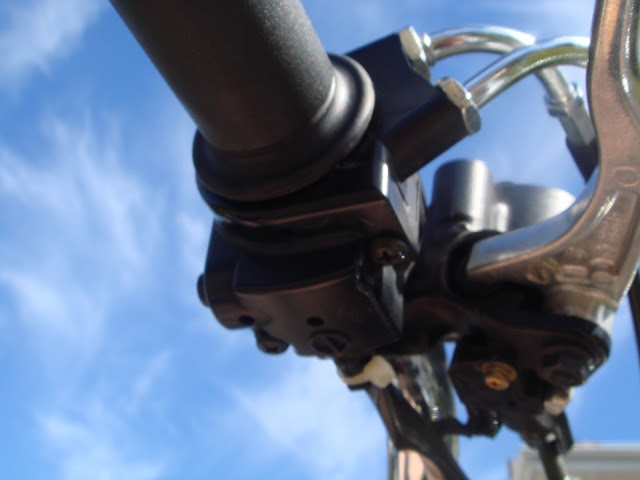
Start by removing the clutch and front brake lever by undoing the 2 screws holding each one in place. Then once the levers are loose remove the 2 screws from the accelerator unit and the 2 from the indicator unit. Leave these on the handlebar loose for now. Use an adjustable spanner or a socket wrench to loosen the 4 nuts on the handlebar bracket on top of the yoke. As you are removing the bolts be sure to hold the bars so they don’t fall on to your bike once they are loose.
You can now remove the indicator housing by lifting it slightly and pulling it back. The accelerator unit is attached to the grip which will slide off with a bit of work. Be sure to lift the top section of the unit away from the bar when pulling down as there is a short stem sitting in a hole in the bar which needs to be cleared to get the unit off. Now you should have your bars free.
If you are planning on using the same grips on the new bars you will need to remove the left grip from the bar which will prove to be quite a challenge. I would recommend trying to get some soapy water in between the grip and the bar to get it loose.
The following applies to those who are retaining the existing yoke and fitting standard bars (as opposed to clip-ons). Place your new bars on the yoke, if you have purchased a set of bars with a smaller diameter sit a spacer in each bracket. Place the other half of the spacer on the top of the bar and screw the bars into place (finger tight). In reverse order fit the controls back on to the handle bars, it will now become obvious to you if you are going to need to purchase new cabling. You may want to now also re-route some of your cables. figure out the best position for your cable and test that they have plenty of room to move when you turn the bars full lock either way. Leave everything finger tight for now.
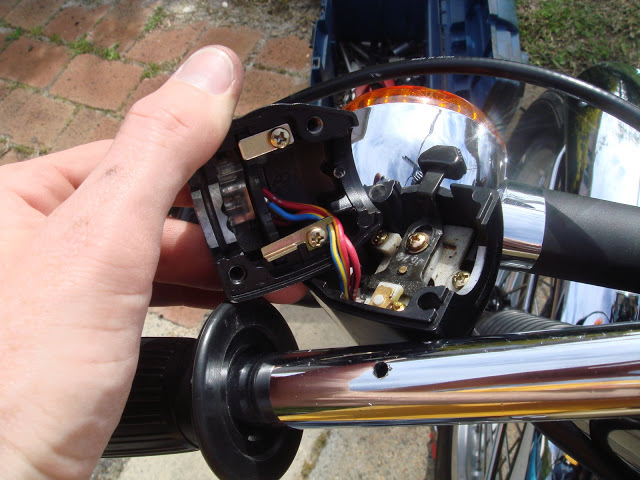
Note: The short stems on the indicator and accelerator unit can be filed off before re-fitting or if you would prefer you can drill holes in the bars…keep in mind if you are drilling holes you need them to be in the exact position so make sure you have everything lined up perfectly or you will have problems reaching your indicators with your thumb.

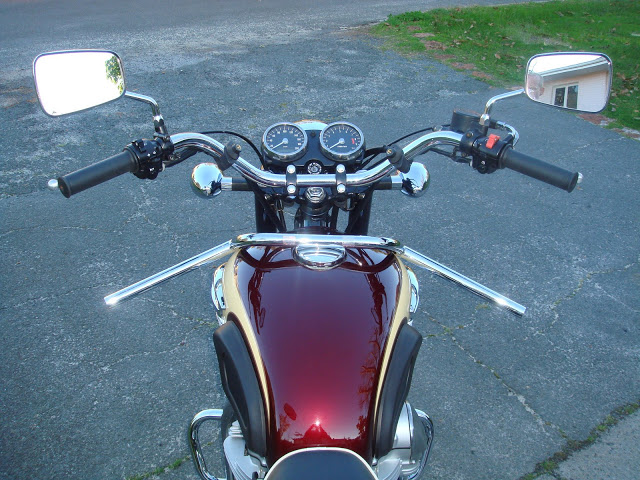
Check that the bars are centered, that they clear the tank at full lock and that you are happy with the riding position. Tighten the bolts with your socket wrench and slide the grip back on to the left side of the bar. Now sit on the bike and adjust the position of the levers (you may need to re-do this serveral times after riding to get them just right). When you are happy with how the controls are position you can tigthen all the screws and you can enjoy your new handlebars.
Be aware that new bars can dramatically change the response of the steering. Practice your slow turns and cornering on some quite back streets at lower speeds to get used to the differences.