Recently the guys at Loaded Gun Customs got in touch to let me know about the Yamaha XS650 rear sets they are producing. I had already made the decision to ditch the stock pedals so went straight to their site and made the purchase.
The original pedals on the XS650 are heavy and on my 79 special with the alloy rims so losing a bit of weight is a good thing. The loaded gun rearsets also look a damn sight better than the standard set up and best of all, they give you the extra clearance you need to get really low on your favourite twisty bends. Here’s how the guys at Loaded Gun describe then:
“Made from lightweight aluminum making the whole kit weigh only 2lbs 14oz. The kit includes a pair of CNC machined aluminum pegs with oil impregnated bronze bushings, and CNC laser cut mounting brackets. Linkage rods with heim joints and mounting hardware are also included. The pegs are knurled for increased grip. The mounting plates bolt to your stock footpeg mounts. Everything bolts on with no frame modifications.”
The rearsets come with easy to follow instructions that even an inexperienced builder (like me) can follow. Fitting them to my Cafe Racer was pretty straight forward but some basic fabrication work was required. If you plan on keeping your kickstart (why wouldn’t you) then you will also need to do some work on it to ensure it clears the rears sets once they are fitted, more on this below.

For the install you’ll need your wrenches or a socket set, a grinder or something for cutting the old brake and gear pedal, a drill press, some Loctite and a set of Allen keys. Here’s the installation process broken down in to steps:
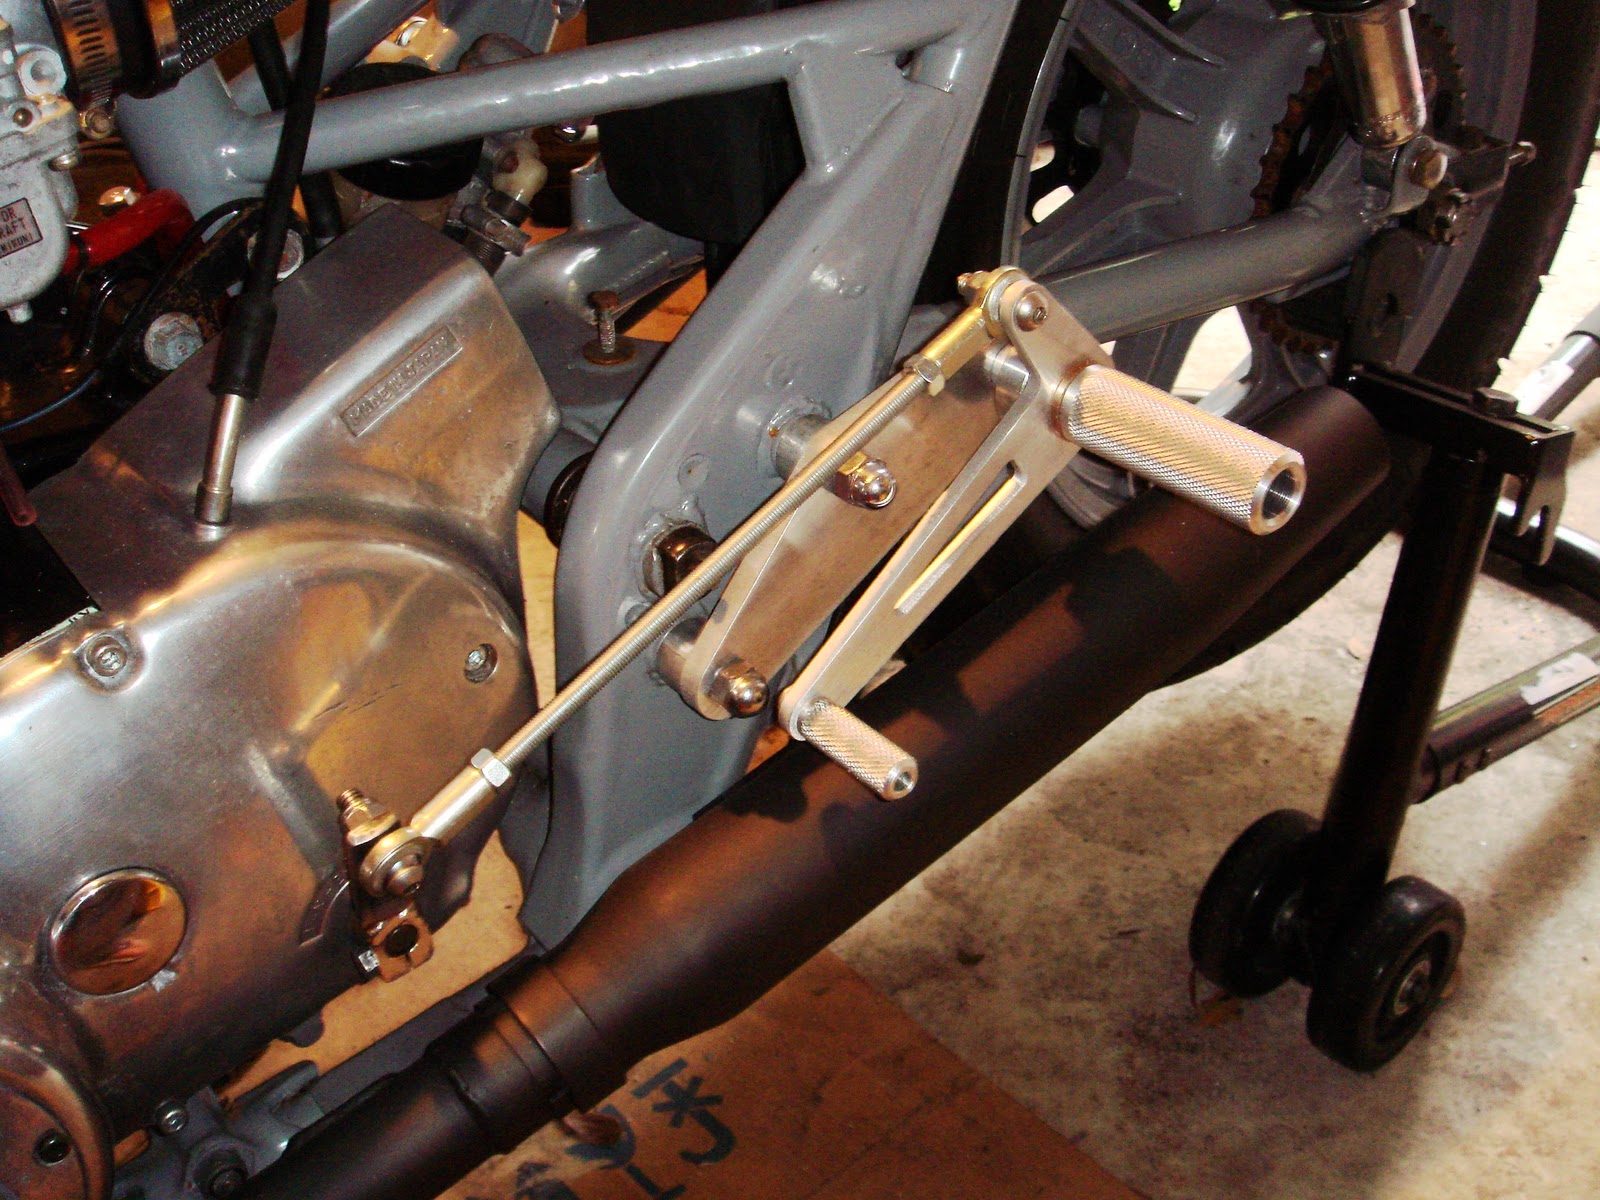
- Start by loosely assembling the rear sets. This will familiarize you with how they work and will help you make sense of the instructions. Note: The pedals should be attached to the mounting plates before they go on the bike.
- Remove the old pedals and levers. You may also need to remove your exhausts to give yourself some space.
- Cut the brake and gear pedals to the lengths describedin the supplied instructions and drill the guide holes using your drill press.
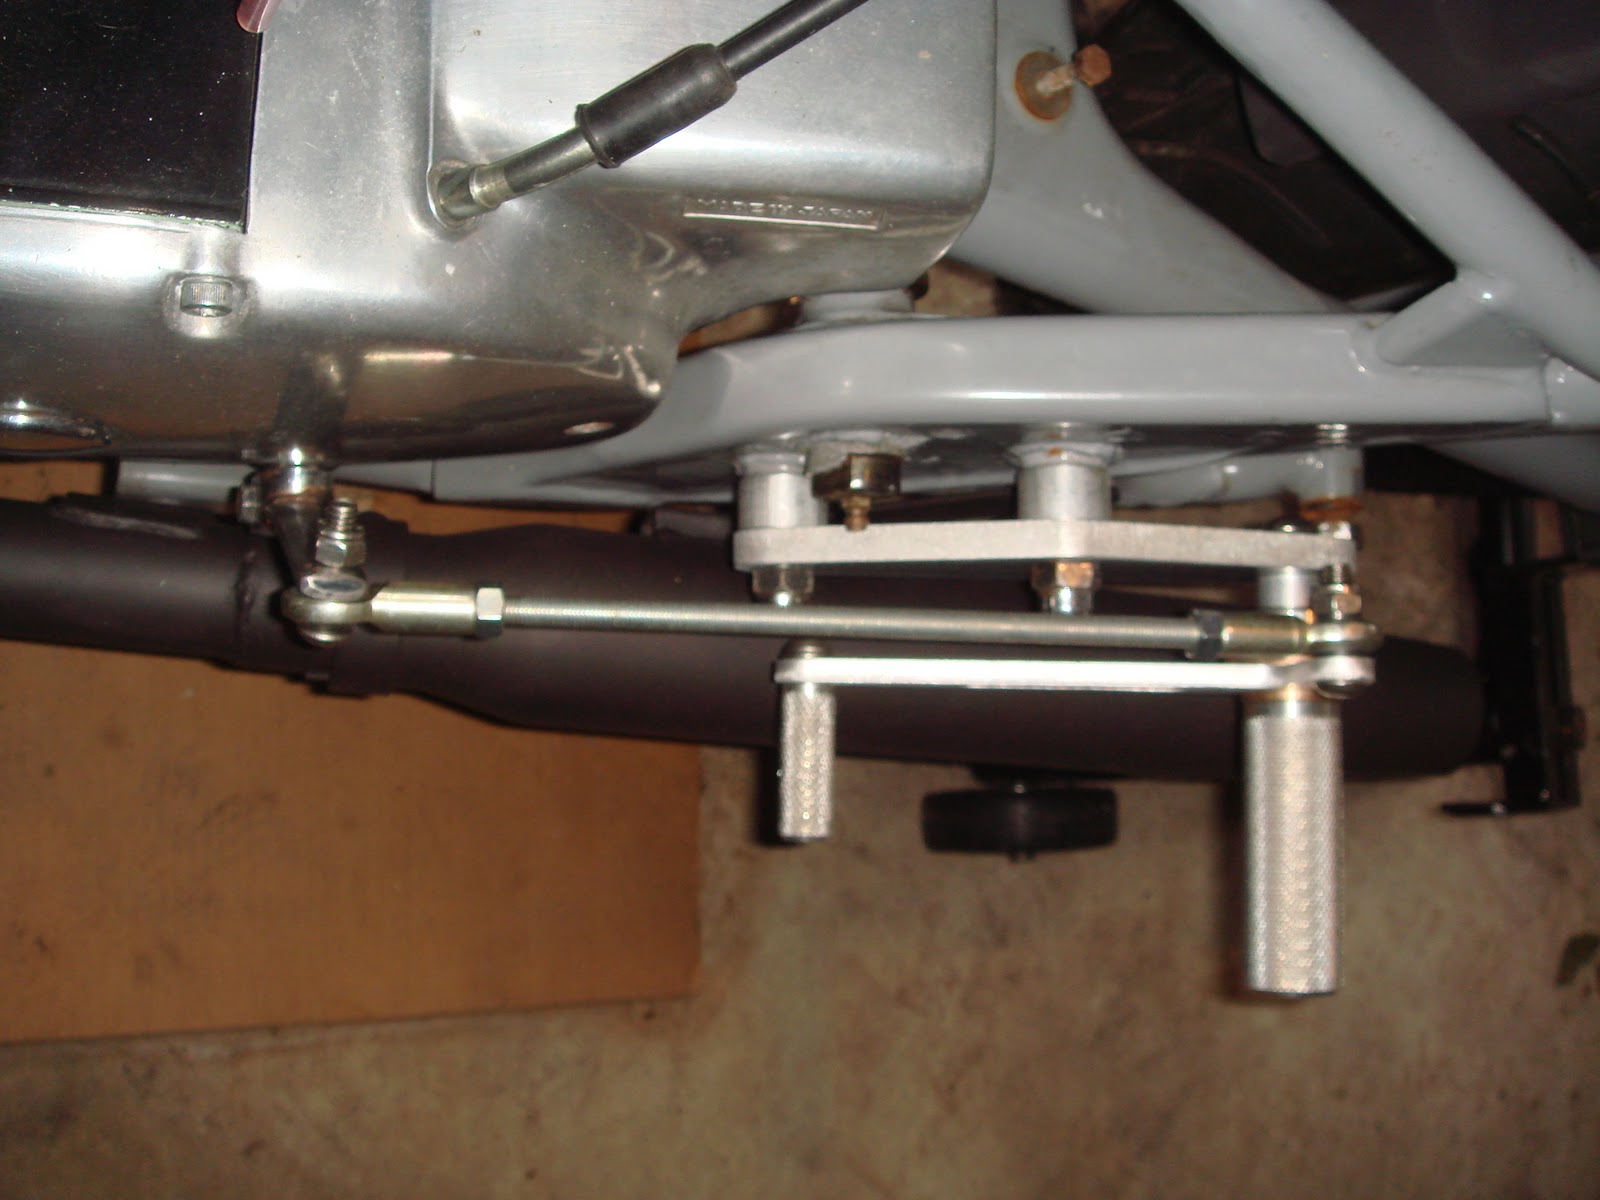
- Fit both modified pedals back on to the motorcycle. Each one should be mounted pointing upwards (twelve o’clock).
- Slide the thick washers on to the original pedal mounts and slide on the mounting plates. Loctice the original mounting nuts before screwing them back on.
- Attach the control arm to the rearsets and to the modified pedals. Adjust control arm length and tighten in to position.
- Re-attach exhaust and you’re done! You can now test them out and get the position right before hitting the road again.
- If you are hoping to use the kick start then you will also need to bend it to fit around the pedals. Instructions on how to do this are also provided with the rearsets.

You can also see a set on the brown XS650 built by Loaded Gun below (that bike sounds amazing!). The results speak for themselves. If you want a set head over to Loaded Gun Customs or Dime City Cycles now.